
Golf Simulator Condo Amenity Design & Installation in Toronto & the GTA

Complete planning, design, construction coordination, installation, and commissioning for condo golf simulator amenities built around resident experience, durability, and reliable day-to-day operation.

  • Purpose-built amenity planning
  • Durable shared-use design
  • Acoustic & impact planning
  • Commissioning & handover
  • Custom room design
  • Project consultations
Golf Simulator Condo Amenity Design & Installation for clients in Toronto and the GTA
Condo Amenity

“They designed and installed our basement sim from scratch — clean finish, accurate launch monitor setup, and it plays exactly like we hoped.”

Sarah L. · Oakville

Need a design consult?

Contact us online

Condo Amenity

Built around the room first

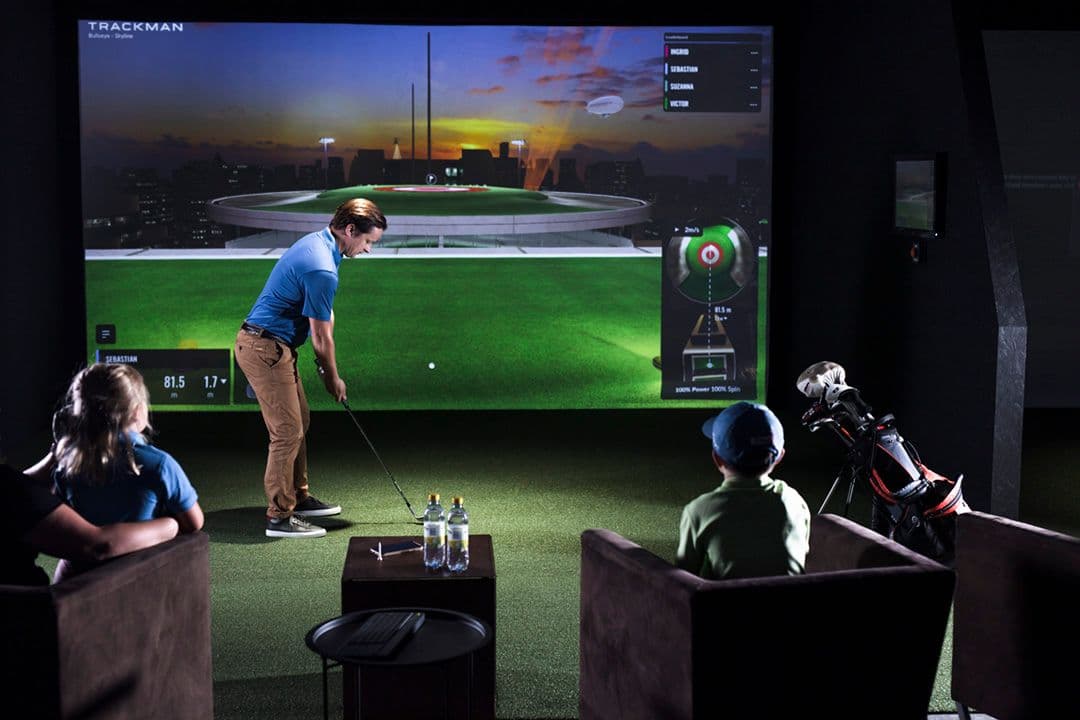
A golf simulator condo amenity succeeds when residents see it as a room worth booking, not a technology package placed in leftover space. The concept has to work for first-time players and experienced golfers, left- and right-handed swings, individual practice and social play, while still fitting the building’s standards for safety, acoustics, accessibility, finishes, and ongoing management.

That makes a shared amenity different from a private home simulator. More people use it, equipment receives more wear, and every unclear operating detail eventually reaches property management. We plan the room, impact protection, flooring, acoustics, launch monitor, projection, software, and user flow as one coordinated system so the finished space is inviting and practical to operate.

Built In Golf works with condo developers, corporations, boards, property managers, architects, designers, and general contractors across Toronto and the GTA. We can enter during early amenity planning, coordinate through construction, or assess an existing room for conversion. The goal is a polished, dependable condo golf simulator that feels intentional within the building and is ready for residents at handover.

Best Fit

When this service makes sense

The right scope depends on the room, the stage of your project, and how finished the space needs to feel.

Fit 1

A simulator is part of a new condo amenity program

Early coordination protects the room dimensions and simulator mounting requirements before ceilings, millwork, and finishes are fixed. We translate equipment requirements into clear information the consultant and construction teams can use.

Fit 2

You are converting an existing amenity or underused room

A site review establishes whether the room can support safe swings, screen setback, equipment mounting, sound control, and comfortable circulation. The result may be a direct conversion or a defined renovation scope rather than an expensive guess.

Fit 3

The board needs a defensible scope before approving capital

A coordinated concept separates essential room work from finish options and technology tiers. That gives the board or ownership group a clearer basis for comparing proposals, budgeting, and deciding what belongs in the first phase.

Fit 4

An existing condo simulator is difficult to use or maintain

Unreliable tracking, confusing controls, worn turf, a dim image, poor acoustics, or fragile exposed equipment can suppress bookings. We assess the full room and prioritize corrections that improve resident experience and operational reliability.

Amenity Strategy

Start with the experience the building wants to offer

The best condo amenity concepts begin with use, not a preferred launch monitor. A practice-focused room has different needs from a social simulator lounge, and a single bookable bay has different circulation, seating, storage, and supervision requirements from two adjacent bays. Establishing the intended experience early keeps the room from becoming either overbuilt for demand or too constrained to be enjoyable.

Resident mix matters as well. A shared simulator should not be optimized around one golfer’s stance, height, or preferred software. We plan a forgiving hitting position, practical club and personal-item storage, clear entry and exit paths, and technology that can serve both left- and right-handed users with minimal adjustment. Where lounge seating or a viewing area is part of the concept, it is placed outside the swing and ball-strike zones rather than squeezed into whatever area remains.

A golf simulator can also complement a broader games room, fitness program, co-working floor, or hospitality lounge. Those adjacencies influence sound isolation, glazing, lighting scenes, booking policies, and whether the simulator should feel visually open or deliberately enclosed. The room should belong to the amenity program as a whole while still protecting the conditions required for accurate tracking and projection.

Room & Infrastructure

Design the whole room around safety, performance, and neighbours

Clear width, depth, and height are the first feasibility test, but raw dimensions do not tell the whole story. Sprinklers, bulkheads, diffusers, lighting, access panels, door swings, structural drops, and projector or sensor locations can all occupy the same volume as a golfer or ball. We map those conditions against the screen, hitting zone, launch monitor requirements, player circulation, and a safe buffer for varied swings before the design is committed.

Acoustics require equal attention in a condominium. Driver impact creates both airborne sound and vibration, while the screen and enclosure generate their own low-frequency energy. Room placement, wall and ceiling assemblies, penetrations, door seals, acoustic finishes, and subfloor construction all affect what reaches neighbouring suites, corridors, and amenity rooms. Decorative panels alone are not a substitute for understanding how sound moves through the building.

Reliable shared use also depends on details that are easy to overlook in a rendering: serviceable cable routes, projector light control, proper structural backing, sensor sightlines, and access to overhead equipment. We document the simulator-specific requirements so the project’s consultants and trades can incorporate them into their own scopes.

Design & Installation

Coordinate construction details before they become site problems

A condo golf simulator touches more of the project than the equipment list suggests. Framing establishes the enclosure and screen plane. Ceiling coordination protects sensor sightlines and service access. Flooring controls stance, putting response, finished height, and the transition to carpet or resilient flooring outside the bay. Interior finishes must look appropriate for the building while surviving repeated impact and public use.

We coordinate the simulator requirements with the project team and sequence installation around the room’s readiness. That includes confirming critical dimensions, backing and mounting points, cable paths, screen access, impact-safe surfaces, turf and hitting-strip locations, projector geometry, equipment clearances, and finish interfaces. The building’s consultants and licensed trades remain responsible for electrical, mechanical, fire-protection, and other building systems. On retrofit projects, the same process identifies what can remain, what needs protection, and what must change before new equipment is installed.

Commissioning is treated as part of the build, not an afterthought. The screen is tensioned, projection is aligned, tracking is calibrated at the actual hitting position, software and display settings are configured, and the completed room is tested as residents will use it. The result should be a coherent amenity—not a collection of individually installed parts that property management must troubleshoot.

Operations & Handover

Make the simulator straightforward for residents and staff

A shared simulator needs a simpler operating model than an enthusiast’s private setup. Startup and shutdown should be understandable, common controls should be protected from accidental changes, and residents should know where to stand, how to select play modes, and what is expected at the end of a booking. We plan the interface and handover around repeatable use rather than assuming every player is familiar with simulator software.

Durability comes from both material selection and service access. Replaceable hitting strips, protected screens and sensors, cleanable wall finishes, secure computer storage, and accessible cable routes make routine upkeep less disruptive. We also identify consumable and wear items so the property team understands which components will eventually need inspection, adjustment, or replacement.

At completion, property representatives receive a walkthrough of the room, normal operation, basic care, and the settings that should not be changed casually. That handover gives management a practical baseline for resident instructions, booking rules, issue reporting, and future service. A well-planned amenity should support the building’s operations instead of creating a new source of avoidable calls.

Process

Simple, practical next steps

01

Project brief & feasibility

Review the amenity goals, resident profile, drawings or existing room, project stage, budget framework, and operational expectations.

02

Site survey & concept layout

Verify clear dimensions, swing volume, circulation, adjacencies, structure, access, and viable equipment approaches.

03

Design & trade coordination

Develop the bay, impact protection, acoustics, finishes, floor assembly, cable routes, and mounting requirements with the project team.

04

Build & technical installation

Coordinate room readiness, install the enclosure and finishes, integrate hardware and software, and protect service access.

05

Commissioning & handover

Align projection, calibrate tracking, test resident workflows, document normal operation, and orient the property team.

Condo Amenity

Tell us about your project.

Share the room, project stage, plans or photos, and intended use. We will follow up to discuss feasibility, scope, and practical next steps.

Condo Amenity FAQ

Golf Simulator Condo Amenity Design & Installation Questions, Answered

Practical questions clients ask about golf simulator condo amenity design & installation.

How much space does a condo golf simulator amenity need?+

A comfortable shared-use room often targets roughly 15 feet of clear width, 18 to 20 feet of depth, and about 10 feet of clear height, especially when it must accommodate varied golfers and both handednesses. Those figures are planning targets, not a universal rule. The launch monitor, screen system, swing volume, seating, circulation, and ceiling obstructions must be tested together before a room is approved.

Can an existing condo amenity room be converted into a golf simulator?+

Often, yes, if the room has suitable clear dimensions, structure, acoustic separation, and an access path for materials and equipment. A feasibility review should happen before hardware is purchased because a room that looks large on a plan can still be compromised by bulkheads, sprinklers, doors, glazing, or adjacent suites.

How do you control golf simulator noise in a condo building?+

Noise control starts with room location and the building assemblies, then addresses impact surfaces, wall and ceiling construction, penetrations, doors, floors, and mechanical paths. Acoustic wall panels can improve the room, but they do not replace isolation where sound or vibration could reach residences. The appropriate strategy depends on the existing construction and neighbouring uses.

What launch monitor works best for a condo amenity?+

Overhead camera-based systems are often practical because they keep equipment off the floor, support left- and right-handed players without moving a unit, and simplify the hitting area. The final choice still depends on room dimensions, mounting height, lighting, software, budget, and the level of ball and club data the building wants to provide.

Should the simulator be planned during condo design or added after construction?+

Earlier is better. During design, the team can protect clear room dimensions and account for structure, acoustics, sprinkler locations, equipment mounting, ceiling access, cable routes, and finish transitions before they become change orders. Retrofit installations can work well, but they require a more careful review of what is already built.

How is a condo simulator different from a home golf simulator?+

A condo amenity serves a broader range of players, receives more wear, and must fit booking, safety, maintenance, accessibility, and property-management expectations. Controls should be simpler, equipment better protected, finishes more durable, and handover more structured than in a private room tailored to one household.

What does the property manager receive at handover?+

The handover covers normal startup and shutdown, resident-use flow, basic room care, important system settings, wear items, and how to report problems clearly. The exact documentation and orientation are scoped to the installed system and the building’s operating model.

What determines the cost of a golf simulator condo amenity?+

The main factors are whether the project is new construction or retrofit, room and acoustic work, enclosure and finish quality, launch monitor and projection tier, consultant coordination, and commissioning. We develop an itemized scope after reviewing the room and project stage so decision-makers can separate essential room requirements from optional finish and technology upgrades.

Contact UsGet Quote